At home gel nails peel off – At-home gel nails peel off sets the stage for a quick and easy DIY manicure. This guide provides a comprehensive look at the process, from preparing your nails to achieving a flawless, salon-quality result at home.
We’ll cover everything you need to know about selecting the right peel-off kit, preparing your nails for application, applying the solution, removing the gel, and essential aftercare tips. You’ll discover helpful comparisons of different products, plus a step-by-step approach to mastering this popular at-home beauty technique.
Introduction to At-Home Gel Nail Peel-Off
At-home gel nail peel-off kits offer a convenient and cost-effective alternative to professional salon services for removing gel manicures. These kits typically contain specialized formulas designed to dissolve the gel layer, allowing for easy removal without damaging the natural nail plate. The process is generally straightforward, and with proper technique, can yield satisfactory results.These kits provide a user-friendly approach to removing gel polish, enabling individuals to manage their nail care needs at home.
The process, while not requiring specialized skills, does require adherence to the specific instructions provided with the kit.
Common Components of At-Home Gel Nail Peel-Off Kits
These kits typically include a gel remover solution, often a liquid or a soak-off formula, along with a spatula or similar tool for lifting the softened gel. Some kits may also include a nail file for shaping or smoothing after removal. The exact components may vary depending on the specific brand and product type.
Steps Involved in the Peel-Off Process
The process generally involves these steps: preparing the nails, applying the remover, soaking the nails, lifting the gel, and finishing the nails. Following these steps carefully ensures a safe and effective removal experience.
- Nail Preparation: Clean the nails thoroughly and remove any existing nail polish or debris.
- Applying the Remover: Carefully apply the gel remover to the nails, ensuring the product covers the entire gel layer.
- Soaking the Nails: Submerge the nails in the remover for the specified time, as indicated by the product instructions. This time can vary depending on the formula.
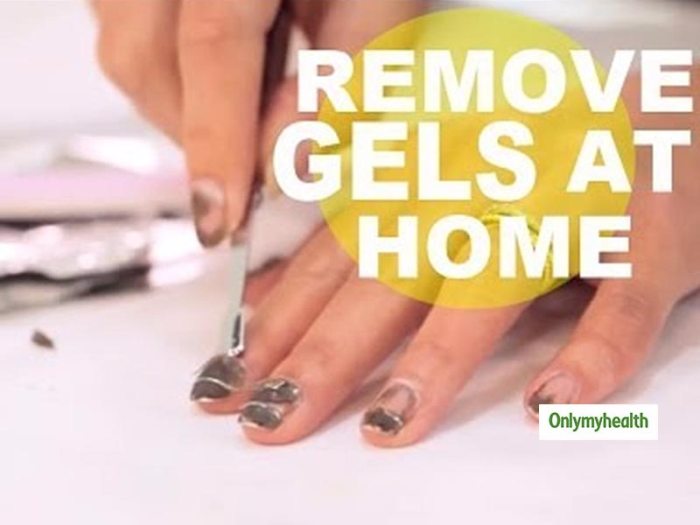
- Lifting the Gel: Gently lift the softened gel layer using a spatula or similar tool, working from one side of the nail to the other. Be cautious not to exert too much pressure to avoid damaging the natural nail.
- Finishing the Nails: After removal, carefully file or buff the nails to smooth out any imperfections. Apply a moisturizer to hydrate the nails.
Benefits of At-Home Gel Nail Removal
At-home gel nail removal offers several advantages compared to professional services. These include cost savings, convenience, and the ability to control the removal process at one’s own pace and comfort. It allows for personalized care and reduced wait times.
Different Types of Gel Nail Peel-Off Formulas
Gel nail peel-off formulas come in various types, each designed for different removal speeds and application methods. These include fast-acting formulas, overnight soaks, and soak-off solutions.
- Fast-Acting Formulas: These formulas are designed to dissolve the gel quickly, typically within a few minutes to 30 minutes, reducing the time needed for removal.
- Overnight Soaks: These formulas are designed for overnight application, allowing the gel to soften gradually, typically for optimal removal the next day. This approach is gentler on the nails and often considered less abrasive than fast-acting formulas.
- Soak-Off Solutions: These solutions are specifically formulated to dissolve the gel through a soaking process. This type often comes in a liquid form, typically requiring a specific soak time to achieve removal.
Comparison of Peel-Off Products, At home gel nails peel off
The table below compares different peel-off products based on their features, benefits, and pricing.
| Product | Features | Benefits | Price |
|---|---|---|---|
| Quick-Strip Gel Remover | Fast-acting formula, easy to use, comes with a spatula | Quick removal, minimal damage to natural nails, cost-effective | $10 |
| Overnight Gel Remover Soak | Gentle overnight soak, less likely to damage nails, easy application | Gentle removal, less risk of nail damage, suitable for sensitive nails | $12 |
| Professional-Strength Soak-Off Solution | Professional-grade formula, powerful dissolving action, suitable for thick gel layers | Effective removal of thick gel layers, suitable for various nail types, can last longer | $15 |
Preparing for At-Home Gel Nail Removal
Proper preparation is crucial for successful and safe at-home gel nail removal. This involves meticulous attention to detail, from selecting the right tools and materials to ensuring a sanitary workspace. A well-planned approach minimizes the risk of damage to the natural nail plate and promotes a comfortable and efficient removal process.
Essential Tools and Materials
A comprehensive toolkit is essential for successful gel nail removal. This includes specialized tools designed for the task, alongside essential materials to maintain hygiene and prevent infection. The specific tools and materials required are presented below.
- Acetone-based remover: A high-quality acetone-based remover is necessary for dissolving the gel. The concentration of acetone can vary; some removers may include additional ingredients to soften the nail plate, though pure acetone is the most effective dissolving agent. Carefully read the product label for usage instructions and precautions.
- Nail file: A fine-grit nail file is necessary for removing any excess gel from the nail surface before soaking. A coarse file can damage the natural nail, so selecting the appropriate file is critical. Consider a buffer file for a smoother, polished nail surface.
- Cotton pads or balls: These are used to apply the remover and to remove excess remover from the nails during the soaking process. Avoid using materials that may leave fibers or residue on the nails.
- Aluminum foil: Aluminum foil can be used to protect the surrounding skin and prevent accidental contact with the remover.
- Protective gloves: Wearing disposable gloves is a critical safety precaution. This protects the hands and skin from direct contact with the acetone-based remover.
- Cuticle pusher: A cuticle pusher is helpful for gently pushing back the cuticles to prevent irritation during the removal process. Gentle and precise application is vital to prevent injury.
- Nail buffer: A nail buffer can be used to refine the surface of the nails after the gel is removed. This enhances the nail’s appearance.
Nail Preparation Before Application
Proper nail preparation before gel application is essential to maintain nail health. The health and condition of the natural nail bed directly influences the quality of the application and subsequent removal.
- Cleaning: Thoroughly clean the nails with a mild soap and warm water. This removes any dirt, oil, or residue that may interfere with the adhesion of the gel.
- Cuticle care: Push back cuticles gently to prevent any interference with the gel application. This prevents possible tearing and irritation during the removal process.
- File and shape: Gently file the nails to the desired shape and length. A smooth surface is crucial for an even gel application.
Safety Precautions During Removal
Adhering to safety precautions is vital for a safe and effective at-home gel nail removal process. Careful attention to detail minimizes the risk of complications and ensures a positive experience.
- Ventilation: Ensure adequate ventilation in the workspace. Acetone can be irritating to the respiratory system. Working in a well-ventilated area minimizes inhalation of fumes.
- Avoid contact: Do not allow the remover to come into contact with the eyes or sensitive skin. Always wear protective gloves and use appropriate safety measures.
- Time management: Follow the manufacturer’s instructions for soaking time. Exceeding the recommended time can weaken the natural nail plate.
Cleaning and Sanitizing Workspace and Tools
Maintaining a sanitary workspace and utilizing proper cleaning procedures are crucial to prevent infection and maintain the integrity of the tools. This minimizes the risk of contamination and promotes a safe environment.
- Workspace disinfection: Clean the workspace with a disinfectant solution. This helps prevent the spread of germs and bacteria.
- Tool sterilization: Clean and sterilize tools after each use to prevent cross-contamination. This is essential for preventing infection and maintaining the tools’ efficacy.
Step-by-Step Nail Preparation Guide
This guide Artikels the steps for preparing nails for gel application. Each step plays a crucial role in ensuring a successful and safe removal process.
- Clean nails thoroughly with soap and water.
- Push back cuticles gently with a cuticle pusher.
- File nails to desired shape and length, ensuring a smooth surface.
- Apply acetone remover to cotton pads or balls.
- Wrap nails and surrounding skin with aluminum foil to protect the skin.
- Soak nails in remover according to product instructions.
- Remove foil and gently wipe away excess remover.
- Repeat as needed until gel is completely removed.
- Buff and shape nails to desired smoothness.
Applying the Peel-Off Solution
Proper application of the peel-off solution is crucial for successful and safe at-home gel nail removal. Careful technique ensures even coverage, prevents skin irritation, and maximizes the effectiveness of the product. This section details the optimal application methods, emphasizing precision and safety.
Optimal Application Techniques
Precise application of the peel-off solution is key to achieving even coverage and minimizing the risk of skin irritation. Begin by applying a thin, even layer of the solution directly onto the gel nail. Avoid thick application, as this can lead to uneven removal and potentially damage the natural nail. Focus on ensuring that the entire surface of the gel nail is saturated.
Use a small, soft brush or cotton swab to meticulously apply the solution, taking care not to spread the product onto the surrounding skin.
Ensuring Adequate Exposure Time
Following the manufacturer’s instructions is paramount for ensuring the peel-off solution remains on the nails for the appropriate duration. This allows the solution to effectively break down the gel’s adhesive properties. The recommended time varies depending on the specific product; always refer to the product label for precise instructions. It’s crucial to adhere to the recommended exposure time, as insufficient exposure may not adequately dissolve the gel, while excessive exposure can potentially damage the natural nail.
Preventing Skin Contact
To minimize the risk of skin irritation and ensure a clean removal process, careful application is vital. Use a small, soft brush or cotton swab to precisely apply the solution, focusing only on the gel nail surface. A barrier cream or petroleum jelly can be applied to the skin surrounding the nails to prevent the solution from coming into contact with the skin.
Gentle application and precision are key to preventing unwanted contact with the surrounding skin.
Application Method Comparison
| Application Method | Pros | Cons |
|---|---|---|
| Method A: Thin, Even Layer Application | Ensures even gel dissolution, minimizes skin irritation, and allows for a smoother peel-off. | Requires meticulous precision and a steady hand to avoid drips and uneven coverage. |
| Method B: Localized Application | Concentrated product application can be effective in targeted areas where gel buildup is concentrated, allowing for a faster removal process. | May not provide even coverage across the entire nail surface, leading to uneven removal and potentially damage to the natural nail. |
Removing the Gel Nails
Carefully removing gel nails is crucial to prevent damage to the natural nail bed. Improper removal techniques can lead to breakage, tearing, and even infection. Understanding the process and common pitfalls is essential for a successful and safe at-home removal experience.The process of gel nail removal involves dissolving the gel layer to separate it from the natural nail.
The success of this procedure depends on careful technique and appropriate tools. Incorrect handling can result in irreversible damage to the natural nail. Proper precautions and a systematic approach are key to achieving a smooth and successful removal.
Methods of Gel Nail Removal
Several methods exist for removing gel nails at home. The effectiveness and safety of each technique vary. Understanding the different approaches allows for informed decision-making.
- Acetone-based Removal: Acetone, a powerful solvent, is the most common method. It effectively dissolves the gel, allowing for easy removal. However, prolonged exposure to acetone can weaken the natural nails and cause dryness and irritation. It is recommended to use a nail strengthener or moisturizer after the removal process to combat these effects. Careful application and monitoring of exposure time are crucial to avoid detrimental effects on the natural nail plate.
- Specific Gel Nail Removers: Specialized gel nail removers are available in various formulations, often designed to minimize damage to the natural nail. These solutions usually contain fewer harsh chemicals than acetone-based removers. Their effectiveness varies based on the specific product and the type of gel used. Thorough research and adherence to the product instructions are important to ensure safe and effective removal.
Dealing with at-home gel nails that peel off can be frustrating. Fortunately, a local bank like new era bank bonne terre missouri offers convenient services, and perhaps some advice on better nail care products. The issue of those stubborn peels though, remains a common problem to address.
- File and Soak Method: This method involves filing the gel nails down to the natural nail. A soak is then used to loosen the remaining gel. This method is often used in conjunction with acetone or specialized gel removers to dissolve the remaining gel. It is often considered more time-consuming but less damaging to the natural nail than prolonged acetone soaks.
Avoiding Damage During Removal
Careful handling and consideration of factors are vital to prevent damage to the natural nails during gel nail removal.
- Proper Nail Preparation: Soaking the nails in warm water for 5-10 minutes prior to removal can soften the gel, making it easier to remove. Using a cuticle pusher to gently push back the cuticles can prevent tearing and damage to the surrounding skin. Avoid harsh scrubbing or pulling on the cuticles.
- Controlled Removal: Avoid forceful pulling or scraping of the gel nails. Use gentle and controlled motions when applying the removal solution or working with tools to avoid damage to the natural nail. Using a cuticle pusher or a soft-bristled brush to remove any excess solution or residue is helpful.
- Monitoring Exposure Time: Pay close attention to the exposure time of the removal solution. Prolonged soaking can weaken the natural nails. Follow the product instructions for optimal results and to avoid excessive damage. Regular checks of the nail’s condition during the removal process are necessary to avoid over-exposure to the solvents.
- Avoiding Common Mistakes: Pulling the gel nails off in one quick motion can cause tearing or breakage. Instead, use a slow, controlled process to loosen the gel gradually. Don’t apply too much pressure to the nail plate while removing the gel or while using tools. Ensure the tools used are appropriate for the task, to avoid unwanted damage.
Common Mistakes to Avoid
Several common mistakes can lead to damaged natural nails during gel removal.
- Using Excessive Force: Using excessive force during the removal process can cause damage to the natural nails. Avoid pulling or scraping the gel off in a forceful manner, which can lead to tearing or breakage.
- Inadequate Soaking Time: Insufficient soaking time can lead to difficulty in removing the gel, increasing the risk of tearing or damaging the natural nail. Ensure the nails are soaked for the appropriate time as per the product instructions.
- Improper Tool Usage: Using improper tools, such as rough or sharp objects, can cause unnecessary damage to the natural nails. Ensure the tools used are designed for the task and are handled with care.
Aftercare and Maintenance
Proper aftercare is crucial for maintaining healthy natural nails and preventing irritation after gel nail removal. This phase involves addressing any potential damage and promoting the healing and regrowth of strong, healthy nails. The right approach to aftercare minimizes discomfort and ensures a smooth transition back to natural nail health.
Importance of Proper Nail Care After Removal
Following a thorough removal process, the natural nails may be weakened, and the surrounding skin may be irritated. Diligent nail care in the immediate aftermath is essential to promote healing and prevent further damage. This involves gentle handling and avoiding activities that could cause stress or trauma to the newly exposed nail bed.
Treating and Soothing Irritated Skin
Gentle hydration and soothing techniques are important for alleviating irritation around the nail plate. Applying a moisturizer specifically formulated for cuticles can effectively hydrate and soften dry, cracked skin. Applying a thin layer of petroleum jelly or a similar emollient can also provide a protective barrier, reducing further irritation. Avoid harsh scrubbing or abrasive materials, which could further damage the delicate skin.
Maintaining Healthy Natural Nails After Removal
Maintaining the health of natural nails after gel removal requires a multifaceted approach. Maintaining a consistent moisturizing routine, including the use of a cuticle oil or cream, is vital for preventing dryness and cracking. A balanced diet rich in essential vitamins and minerals is also beneficial for promoting nail growth and strength. Adequate hydration is crucial for overall nail health.
Preventing Damage to Natural Nails During Removal
To minimize damage to natural nails during the removal process, use the appropriate peel-off solution and follow the instructions carefully. Avoid prolonged exposure to the solution. Apply the solution only to the gel layer, being careful not to damage the natural nail plate itself. Employ gentle pressure when lifting the gel nails, and do not force any sections.
Using a soft-bristled brush or similar tool can help lift the gel in a more controlled manner.
Essential Aftercare Products
- Moisturizer for dry cuticles: A moisturizing cream or oil specifically formulated for cuticles helps to hydrate and soften dry, cracked skin around the nails. Look for products containing ingredients like shea butter, aloe vera, or vitamin E. Applying a thin layer daily will help maintain healthy cuticles and prevent further irritation. The consistency and concentration of the moisturizer are crucial in ensuring proper hydration and minimizing any potential irritation.
Removing gel nails at home can be tricky, often leading to painful peeling. However, choosing the right feline companion, like a best breed for house cat , can sometimes offer a similar, but less frustrating, experience. A well-chosen cat, with their gentle nature, can provide much-needed distraction during the process, making the at-home gel nail removal less stressful.
- Nail strengthener for weakened nails: A nail strengthener is essential for promoting nail health and preventing further breakage. These products often contain ingredients like keratin or proteins that strengthen the nail plate. Regular application of a nail strengthener can help prevent splitting, cracking, and breakage, especially after gel removal. The strengthener should be applied daily or as directed, according to the product instructions.
Troubleshooting Common Issues

At-home gel nail peel-off can sometimes present challenges. Understanding potential problems and their solutions is crucial for achieving successful results and preserving the health of your natural nails. This section details common difficulties encountered during the process and provides practical strategies to overcome them.
Gel Not Peeling Off
Gel that resists peeling off can stem from several factors. Improper application of the peel-off solution, inadequate soaking time, or using an unsuitable product are all possible causes. Ensuring the solution is properly applied to the entire nail surface, and allowing sufficient contact time according to the product instructions, are critical steps to achieving a successful peel-off. If the gel remains stubborn after initial attempts, reapplying the solution or switching to a different product may be necessary.
Different peel-off solutions have varying strengths and formulations, and some may be more effective on specific types of gel polish.
Natural Nail Damage
During the gel nail removal process, natural nails can become brittle, thin, or experience other forms of damage. This is particularly true if the peel-off solution is left on for extended periods, or if excessive force is used when attempting to remove the gel. It is essential to follow the manufacturer’s instructions carefully, ensuring that the soaking time is not prolonged unnecessarily.
Gentle handling of the nails throughout the process is critical. If damage occurs, immediate steps should be taken to address it. Moisturizing the nails regularly and using a nail strengthening treatment can help repair any damage and promote nail health.
Table of Common Problems and Solutions
| Problem | Solution |
|---|---|
| Gel not peeling off easily | Re-apply the peel-off solution, ensuring complete coverage of the nail. Increase soaking time, but only as directed by the product instructions. Consider switching to a different peel-off solution if the first attempt fails. |
| Natural nail damage (e.g., breakage, thinning) | Use caution and gentle pressure when handling the nails. Avoid prolonged soaking times. Immediately after removal, apply a moisturizing cuticle oil or a nail strengthening treatment. |
| Solution doesn’t work as expected | Ensure the product is fresh and hasn’t expired. Check that the correct product for the specific gel type is used. If the issue persists, consult with a professional nail technician for personalized advice. |
Last Recap
In conclusion, removing gel nails at home is a rewarding experience, offering significant cost savings and flexibility compared to professional salons. By following this comprehensive guide, you’ll confidently navigate the process, from preparation to aftercare, ensuring beautiful, long-lasting results and healthy nails. Remember to prioritize safety, and don’t hesitate to troubleshoot any issues along the way. Enjoy your new, stunning at-home manicure!
User Queries: At Home Gel Nails Peel Off
Q: How long does a typical gel nail peel-off solution take to work?
A: Most overnight peel-off solutions work within 8-12 hours, while faster-acting formulas may take 2-4 hours. Always follow the product instructions.
Q: What if the gel doesn’t peel off easily?
A: If the gel is stubborn, you can try reapplying the solution, gently lifting the edges, or using a cuticle pusher to help loosen the gel. Consider if a different product might be better suited for your nails.
Q: What should I do if my natural nails get damaged during the removal process?
A: If your natural nails tear or become damaged, gently file down any rough edges, and consider using a nail strengthener to support them during the healing process.
Q: Can I use any nail polish remover to remove gel nails?
A: No, specialized peel-off solutions are necessary for removing gel nails safely and effectively. Using regular nail polish remover may damage your natural nails and won’t remove the gel.
