Cranberry white chocolate scones recipe: A delightful treat awaits, bursting with the sweet tang of cranberries and the rich smoothness of white chocolate. These scones are easy to make and perfect for a quick breakfast or a satisfying afternoon snack. Their inviting aroma and irresistible texture make them a crowd-pleaser, ideal for any occasion.
This recipe will guide you through every step, from ingredient selection to baking and serving suggestions. Discover how to achieve perfectly risen scones with a delightful balance of flavors and textures.
Introduction to Cranberry White Chocolate Scones
Scones, those delightful little pockets of buttery goodness, are a versatile treat that can be enjoyed as a light breakfast, a satisfying afternoon snack, or even a sweet accompaniment to a cup of tea. Their airy texture and customizable nature make them a popular choice for bakers of all skill levels. This recipe takes scones to the next level, incorporating the tangy sweetness of cranberries and the decadent richness of white chocolate for a truly unforgettable experience.
Cranberries, with their tart and juicy essence, provide a delightful counterpoint to the creamy sweetness of white chocolate. The combination of these flavors creates a harmonious blend that tantalizes the taste buds. The addition of cranberries also adds a burst of texture, creating a delightful contrast to the smooth, melt-in-your-mouth white chocolate. This recipe aims to create scones that are not only delicious but also visually appealing, showcasing the beautiful interplay of flavors and textures.
Flavor Profile and Texture
The combination of tart cranberries and creamy white chocolate creates a dynamic flavor profile. The sweetness of the white chocolate complements the subtle tartness of the cranberries, creating a balanced and satisfying taste experience. The texture of the scones is a key component of their appeal. A light and airy crumb provides a satisfying chew, while the addition of cranberries and white chocolate adds a delightful textural contrast.
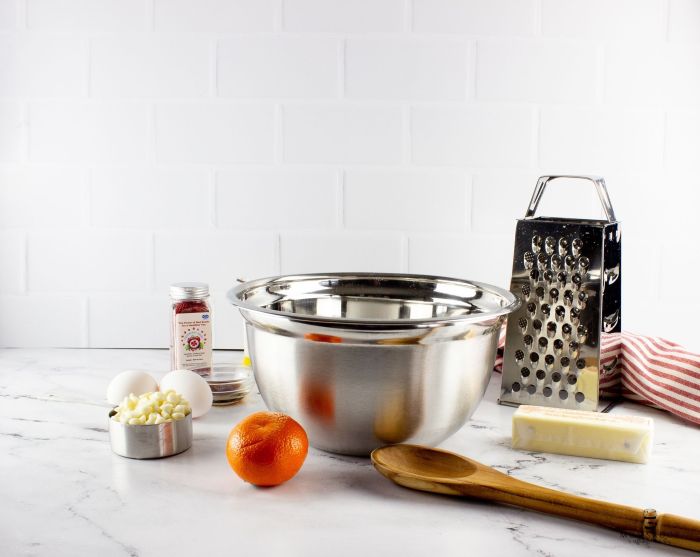
Ingredients and Preparation
This recipe emphasizes the importance of high-quality ingredients to ensure the best possible outcome. Fresh cranberries, high-quality white chocolate, and a touch of butter will elevate the scones to a new level. The preparation process is carefully designed to ensure the scones maintain their light and airy texture, and incorporate the flavor components seamlessly. Following the precise instructions and paying attention to each step will help create the perfect consistency.
Visual Appeal
The visual appeal of the scones is just as important as their taste. The vibrant red of the cranberries and the glossy white of the melted white chocolate create a visually striking contrast. The scones’ golden-brown crust adds a touch of warmth and enhances their overall appeal. Proper baking techniques are crucial to achieving a consistent and appealing appearance, showcasing the beautiful interplay of colors and textures.
Ingredients and Their Roles
The magic of scones, like a perfectly executed symphony, relies on the harmonious interplay of its ingredients. Each component plays a crucial role in creating the delightful texture, flavor, and overall experience. Let’s delve into the culinary alchemy behind these delightful treats!
Ingredient Breakdown
To craft the ideal cranberry white chocolate scones, we need a precise blend of ingredients, each carefully chosen for its unique contribution. Understanding their individual roles will empower you to tailor the recipe to your specific preferences and create a truly unforgettable experience.
| Ingredient | Quantity | Type |
|---|---|---|
| All-purpose flour | 2 1/2 cups | Plain, bleached flour |
| Unsalted butter | 1 cup | Cold, cubed butter |
| Granulated sugar | 1/4 cup | White granulated sugar |
| Baking powder | 2 teaspoons | Baking powder |
| Baking soda | 1/2 teaspoon | Baking soda |
| Salt | 1/2 teaspoon | Table salt |
| Milk | 1/2 cup | Whole milk or buttermilk |
| Cranberries | 1 cup | Dried cranberries, chopped |
| White chocolate chips | 1/2 cup | Semi-sweet or milk chocolate chips |
The Role of Each Ingredient
Each ingredient in this recipe contributes to the final outcome, from the light and airy texture to the delightful flavor profile. Let’s explore the individual roles of each ingredient:
- Flour: Provides structure and helps create the characteristic crumbly texture. The protein in flour interacts with moisture to create gluten, which strengthens the dough. All-purpose flour is a versatile choice for scones.
- Butter: Provides richness and flakiness. Cold, cubed butter prevents the dough from becoming too wet and ensures a desirable crumbly texture. The fat also helps create air pockets during baking, which contributes to the light and airy quality.
- Sugar: Adds sweetness and enhances the overall flavor. Granulated sugar contributes to the desired sweetness level. It also helps with browning.
- Leavening Agents (Baking powder & Baking soda): Create lift and volume. Baking powder contains both an acid and a base, while baking soda is a base. The combination of these leavening agents ensures the scones rise and achieve a light texture.
- Salt: Enhances the flavors of the other ingredients. Salt is crucial for balancing the sweetness and acidity of the cranberries and white chocolate.
- Milk: Provides moisture and helps bind the ingredients. Whole milk adds richness, while buttermilk creates a tangier flavor. The moisture content is essential for achieving a soft, tender texture.
- Cranberries: Provide tartness and a burst of flavor. The cranberries add a delightful tangy flavor, complementing the sweetness of the white chocolate. Choose fresh or dried cranberries; fresh cranberries will yield a more intense flavor.
- White Chocolate Chips: Adds sweetness and a melt-in-your-mouth texture. Semi-sweet or milk chocolate chips are a delicious addition to the scones. Their melting quality creates a decadent element within each bite.
Cranberry and White Chocolate Variations
Different types of cranberries and white chocolate chips can impact the final product. Exploring these options can lead to unique and personalized scones.
- Cranberry Variations: Dried cranberries offer a concentrated cranberry flavor, while fresh cranberries provide a more intense burst of tartness. Consider the desired intensity of flavor when selecting your cranberries.
- White Chocolate Variations: Semi-sweet white chocolate chips will yield a richer flavor compared to milk chocolate chips. The choice of white chocolate can influence the overall sweetness of the scones.
Mixing and Preparation Methods
Transforming dry ingredients into a delightful scone requires a delicate touch, much like coaxing a shy friend into a conversation. Proper mixing techniques are paramount to achieving a tender crumb and a beautiful, even texture. Understanding the interplay between wet and dry ingredients is key to creating scones that are light, fluffy, and irresistible. Let’s delve into the art of creating these perfect little pockets of happiness!A crucial aspect of scone success lies in the meticulous handling of the dough.
Overmixing develops the gluten in the flour, leading to a tough, dense texture. Gentle handling is the secret to achieving those wonderfully tender scones. This delicate dance of ingredients will create a masterpiece of a baked good!
Combining Dry and Wet Ingredients
Properly combining dry and wet ingredients is essential for a successful scone. The dry ingredients—flour, sugar, baking powder, and salt—form the base, providing structure and lift. The wet ingredients—milk, butter, and eggs—create the tender, moist interior. A critical technique is to gently incorporate the wet ingredients into the dry until a shaggy dough forms. This means you want to avoid overworking the dough.
Incorporating Add-ins
Carefully folding in the cranberries and white chocolate is key to preventing them from sinking to the bottom of the scones. Gently incorporating the add-ins ensures that they are evenly distributed throughout the dough, contributing to a beautiful and flavourful presentation. Imagine the delightful surprise of each bite, revealing a burst of cranberry and a smooth melt of white chocolate!
Handling the Dough
Gentle handling of the dough is essential to avoid over-mixing. Overmixing develops the gluten, resulting in a tough scone. A delicate touch during the mixing and shaping processes preserves the tender texture. Think of the dough as a delicate sculpture; you want to work with it gently and carefully.
Shaping the Scones
Achieving even thickness in the scones is crucial for even baking and a pleasing appearance. Using a lightly floured surface and a floured rolling pin is vital for preventing sticking. Use a ruler or a straight edge to ensure an even thickness.
Step-by-Step Scone Preparation
- Whisk together the dry ingredients (flour, sugar, baking powder, salt) in a large bowl. This creates a homogenous mix of the dry components.
- Cut in the cold butter using a pastry blender or your fingers until the mixture resembles coarse crumbs. This ensures that the butter is evenly distributed throughout the dough.
- In a separate bowl, whisk together the wet ingredients (milk, eggs, and vanilla extract). This ensures a smooth, consistent mixture for the wet ingredients.
- Gradually add the wet ingredients to the dry ingredients, mixing until just combined. Don’t overmix! A shaggy dough is perfect.
- Gently fold in the cranberries and white chocolate chips. Avoid overmixing to ensure the add-ins remain intact.
- Turn the dough out onto a lightly floured surface and gently pat it into a disc about 1 inch thick. Ensure a consistent thickness across the disc for even baking.
- Use a 2-inch cookie cutter to stamp out scones. Place the scones onto a baking sheet lined with parchment paper.
- Brush the tops of the scones with a little milk or egg wash for a golden colour.
- Bake in a preheated oven at 425°F (220°C) for 12-15 minutes, or until golden brown.
- Let the scones cool on a wire rack before serving.
Baking and Cooling Procedures
Transforming your dough into delectable scones requires a delicate balance of heat and time. Proper baking ensures a perfectly golden-brown crust and a tender interior, while cooling prevents them from becoming soggy. Follow these steps to achieve a delightful outcome.
Ideal Baking Temperature and Time
The ideal baking temperature for scones is crucial for achieving the desired texture and color. A temperature range of 400-425°F (200-220°C) is generally recommended. This high heat helps create a crispy exterior while maintaining a soft interior. Baking time varies depending on the size of the scones and the oven’s performance, but typically ranges from 12-15 minutes.
Overbaking can lead to a dry, hard texture, while underbaking results in a dense, uncooked interior.
Checking for Doneness
A crucial step in baking scones is determining when they are fully cooked. The best way to check for doneness is to use a toothpick or a metal skewer to gently probe the center of a scone. If the skewer comes out clean, the scones are ready. If it comes out with a few moist crumbs attached, they require a few more minutes in the oven.
This method ensures that the scones are cooked through without overdrying them.
Transferring and Cooling
Carefully transfer the hot scones from the baking sheet to a wire rack to cool. A wire rack allows air to circulate around the scones, preventing them from becoming soggy from trapped moisture. Placing them directly on a plate or countertop can cause them to become soggy, resulting in a less enjoyable texture.
Preventing Soggy Scones
Cooling scones on a wire rack is essential to prevent them from becoming soggy. Allow the scones to cool completely before consuming them. This cooling process allows the moisture to redistribute evenly, resulting in a more delightful texture and preventing the scones from becoming too soft or mushy. Avoid placing them on a damp surface, as this can cause them to become soggy.
Baking and Cooling Procedure Summary
| Step | Description |
|---|---|
| 1. Preheat Oven | Preheat your oven to 400-425°F (200-220°C). |
| 2. Bake Scones | Place scones on a baking sheet and bake for 12-15 minutes, or until golden brown and a toothpick inserted into the center comes out clean. |
| 3. Transfer to Wire Rack | Carefully transfer the hot scones to a wire rack to cool completely. |
| 4. Cool Completely | Allow the scones to cool completely on the wire rack to prevent them from becoming soggy. |
Serving Suggestions and Variations
Indulge in your freshly baked cranberry white chocolate scones with a delightful array of accompaniments and exciting variations! From classic pairings to innovative twists, this section explores ways to elevate your scone experience. Prepare to be amazed by the diverse possibilities that await!
Serving Suggestions
These delightful scones are best enjoyed fresh, straight from the oven. Their delicate texture and subtle sweetness are perfectly complemented by a variety of pairings. The key is to balance the sweetness of the scones with contrasting flavors and textures.
- Clotted Cream and Jam:
- Whipped Cream and Honey:
- Butter and a sprinkle of cinnamon:
- Fresh Fruit Salad:
A classic pairing that beautifully highlights the scones’ delicate flavor profile. The rich, creamy clotted cream adds a luxurious touch, while a vibrant jam (strawberry, raspberry, or even a homemade fig jam) provides a burst of fruity sweetness. This is a timeless combination that everyone loves!
A lighter alternative that provides a delightful balance of sweetness and creaminess. The delicate sweetness of honey complements the white chocolate and cranberry flavors, while the whipped cream adds a fluffy texture.
A simple yet satisfying option for those who prefer a more neutral flavor. The warm butter melts into the scones, enhancing their inherent tenderness, while a sprinkle of cinnamon adds a comforting warmth and an extra touch of delight.
For a more vibrant and refreshing approach, pair your scones with a colorful assortment of fresh berries like blueberries, raspberries, and blackberries. This option is ideal for a lighter breakfast or brunch.
Variations
Spice up your scone game with these delightful variations! Experiment with different ingredients to create unique and exciting flavor combinations.
- Berry Bliss:
- Chocolate Indulgence:
- Spiced Pecan Delight:
- Lemon Zest and Poppy Seeds:
Swap the cranberries for a medley of fresh or frozen mixed berries (strawberries, blueberries, raspberries) for a burst of fruity goodness. Adjust the sugar content as needed, depending on the natural sweetness of the berries.
Increase the white chocolate content to create a more decadent scone. Consider adding dark chocolate chips for a more intense chocolate flavor.
Incorporate chopped pecans and a dash of warm spices like cinnamon and nutmeg for a comforting autumnal twist.
Add a zesty touch with lemon zest and poppy seeds for a delightful combination of flavors and textures.
Storage and Reheating, Cranberry white chocolate scones recipe
Proper storage and reheating techniques can significantly impact the quality of your leftover scones.
- Storage:
- Reheating:
Store leftover scones in an airtight container at room temperature for up to 2 days, or in the refrigerator for up to a week. Freezing is also an excellent option. Wrap individual scones tightly in plastic wrap and place them in a freezer bag for up to 3 months.
To reheat scones, place them in a preheated oven at 350°F (175°C) for 5-7 minutes, or until warmed through. Alternatively, you can warm them in a toaster oven or microwave. A few seconds in the microwave will quickly warm them up.
Visual Presentation and Garnish
Transforming your cranberry white chocolate scones from a simple treat to a culinary masterpiece begins with a captivating presentation. A well-executed visual presentation can elevate the overall dining experience, making the scones not just delicious but also visually appealing. The right garnishes and color combinations can make your scones pop and invite diners to take a closer look and savor each bite.A visually appealing presentation enhances the sensory experience, encouraging guests to appreciate the effort put into the recipe and appreciate the final product.
The addition of carefully chosen garnishes can elevate the overall aesthetic and create a memorable dining experience.
Garnish Ideas
This section explores various options to garnish your scones, adding a touch of elegance and visual interest. The choice of garnish should complement the scones’ flavors and colors, creating a harmonious and inviting display.
- Fresh cranberries: A classic choice, fresh cranberries add a pop of color and a burst of flavor, perfectly mirroring the cranberries within the scones. Scattered generously over the scones, they create a visually appealing contrast with the white chocolate.
- Whipped cream or cream cheese frosting: A dollop of whipped cream or a light dusting of cream cheese frosting adds a touch of sweetness and a delightful contrast in texture. This complements the scones’ inherent sweetness and adds a visually striking element.
- Powdered sugar: A light dusting of powdered sugar adds a delicate touch and enhances the overall visual appeal. It creates a subtle sheen and elevates the scones’ appearance to a more refined level.
- Candied ginger or orange zest: For a more adventurous flavor profile, candied ginger or orange zest can be incorporated. The vibrant colors and unique textures will add a sophisticated flair to your scones, complementing the cranberry and white chocolate flavors.
Color and Texture Combinations
This section focuses on the use of colors and textures to create visually appealing scones. The interplay of colors and textures enhances the visual appeal and encourages exploration of the food.
- Color Contrast: The vibrant red of fresh cranberries contrasts beautifully with the creamy white of the scones and the white chocolate. This contrast creates a visually striking combination.
- Texture Contrast: The soft texture of the scones is balanced by the crunchy texture of fresh cranberries or the smooth texture of whipped cream. This interplay of textures creates a delightful sensory experience.
Tips for Professional-Looking Presentation
Achieving a professional look in your presentation involves attention to detail and a keen eye for visual harmony.
Consistency in presentation is key. Use the same garnish techniques across all the scones for a unified and polished look. This will ensure a visually appealing and cohesive display, rather than a haphazard assortment.
Showcasing Scones in Photos
Capturing the visual appeal of your scones for online recipes requires a strategic approach.
Nah, those cranberry white chocolate scones look absolutely tempting! If you’re craving something savory, check out the menu at Pizza City Pasadena MD, for a delicious array of pizza and other options. pizza city pasadena md menu But, if you’re still hankering for something sweet, you really can’t go wrong with those scones! They’re just the perfect treat for a cozy afternoon.
- Lighting: Natural light is ideal for showcasing the scones’ colors and textures. Avoid harsh shadows that might obscure the details.
- Background: A simple, neutral background, such as a light wooden table or a plain white surface, will allow the scones to be the focal point. Avoid cluttered or busy backgrounds.
- Angles: Experiment with different angles to highlight the scones’ shape and details. Consider photographing them from above, at eye level, or from a slightly tilted perspective.
Troubleshooting Common Issues
Baking scones can be a delightful experience, but sometimes, things don’t quite go as planned. Knowing how to address common problems can transform a frustrating baking session into a triumphant one. Understanding the potential pitfalls and their solutions will empower you to create perfect scones every time.Troubleshooting involves identifying the root cause of the issue, applying the correct fix, and ultimately preventing similar problems in the future.
Each problem has a specific solution, and this section will detail those solutions.
Those cranberry white chocolate scones look absolutely delicious! But, if you’ve had a single car accident, remember to file your insurance claim promptly, like with single car accident insurance claim. Don’t worry, you can still enjoy the delightful aroma and taste of these scones later, after you’ve taken care of the important matter. Hopefully, the process goes smoothly and you can get back to baking these wonderful treats soon!
Scones Sticking to the Baking Sheet
Often, scones can stick to the baking sheet, resulting in a less-than-ideal outcome. This can stem from several factors, including improper preparation of the baking sheet.
- Insufficient Baking Sheet Preparation: Ensure the baking sheet is well-floured or lined with parchment paper. A lightly greased sheet might not provide enough non-stick surface. A generous dusting of flour or a layer of parchment paper will help prevent sticking.
- Overmixing the Dough: Overmixing the dough develops gluten, leading to a tough and dense texture, and also causing the scones to be more prone to sticking. Be sure to mix the dough until just combined, not overmixed.
- Too Much Moisture: A dough that is too wet will also result in sticking. Ensure the ingredients are properly measured and the dough is not overly moist.
Scones Not Rising Properly
Scones that don’t rise as expected can be due to various factors.
- Incorrect Baking Temperature: A low oven temperature can prevent the scones from rising adequately. Make sure your oven is preheated to the correct temperature, and check it with an oven thermometer to confirm.
- Overmixing the Dough: As mentioned earlier, overmixing develops gluten, making the scones dense and less likely to rise. Ensure the dough is mixed only until combined.
- Insufficient Baking Time: The scones may not have had enough time to rise fully in the oven. Check the scones for doneness by observing their golden color and texture.
Scones are Too Dense
Dense scones can be disappointing, and the cause might be related to the dough’s consistency.
- Overmixing the Dough: Overmixing develops gluten, resulting in a tough and dense texture. Mix the dough just until combined.
- Too Much Flour: Using excessive flour can lead to a dense final product. Follow the recipe’s instructions precisely regarding flour amounts.
- Too Much Liquid: Using excessive liquid can result in a dense consistency. Ensure the dough is not overly moist. Use the correct amount of liquid specified in the recipe.
Scones are Too Dry
Dry scones might be a result of a few factors.
- Insufficient Liquid: The dough might be too dry. Use the correct amount of liquid indicated in the recipe. Gradually add liquid to the dough until it comes together.
- Overmixing: Overmixing the dough can lead to a tough, dry texture. Ensure you only mix the ingredients until combined.
- Baking Time: If the scones are baked for too long, they might become dry. Check the scones for doneness by observing their color and texture.
Closure

In conclusion, this cranberry white chocolate scones recipe offers a delicious and versatile baking experience. The detailed instructions and helpful tips ensure that you create a scrumptious treat that is both visually appealing and incredibly satisfying. Enjoy the process of crafting these delectable scones and the joy of sharing them with loved ones.
Question Bank: Cranberry White Chocolate Scones Recipe
What type of cranberries are best for this recipe?
Fresh or dried cranberries work well. Fresh cranberries add a burst of flavor, while dried ones provide a concentrated sweetness.
Can I substitute the white chocolate chips with a different type of chocolate?
Yes, you can substitute with milk chocolate chips, dark chocolate chips, or even chopped chocolate bars. Adjust the amount according to your preference.
How long should I chill the dough before baking?
Chilling the dough for at least 30 minutes (or even overnight) helps the scones hold their shape and prevents them from spreading too much during baking.
What are some serving suggestions besides clotted cream and jam?
You could serve them with butter, honey, or a dollop of whipped cream. They also pair well with a cup of coffee or tea.
